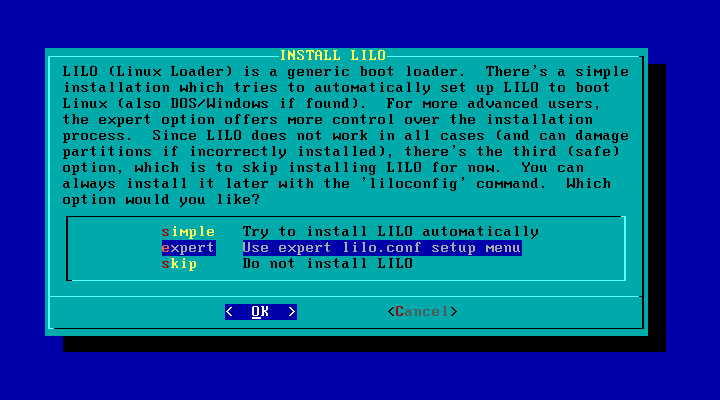
You can use the expert mode to configure LILO by selecting it an pressing Enter.

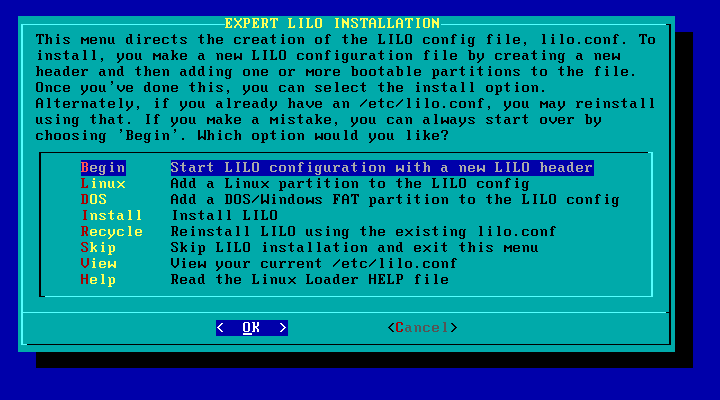
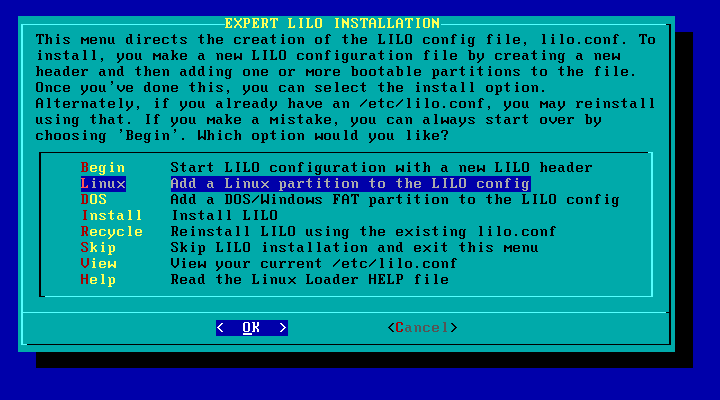
Now you will see a menu of choices for setting up LILO. We will basically work our way down the options one at a time. To start, select the Begin option and press Enter.
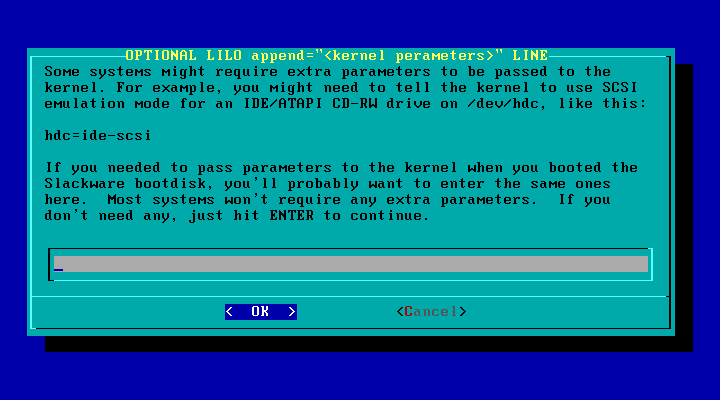
At this point you are allowed to enter extra parameters that will be passed to the kernel when it boots.
Generally, the only time you want to use this if you have an IDE-based CD-RW drive and wish to burn CD-ROM disks using Linux. Traditionally, Linux has only allowed you to use CD-RW drives that were attached to SCSI cards. If you enter a special parameter here, you can however enable and IDE to SCSI emulation mode that allows Linux to use your IDE CD-ROM drive as if it were a SCSI CD drive instead.
You do not need this for standard CD-ROM drives, only for CD burners.
If you do use this feature, remember your CD drive will no longer be accessed using
device names like /dev/hdX, but will instead you must access it
using a device name like /dev/scdX instead. Examine the kernel
startup messages during reboot to find the correct device name(s).
NOTE: Version 2.6 of the Linux kernel (which is under development) will no longer require this IDE to SCSI emulation. The new kernel will be able to use IDE CD-RW drives directly.
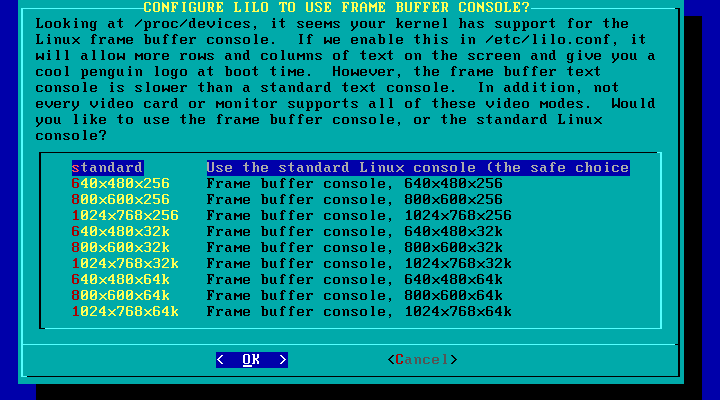
LILO can start Linux in regular text mode, or one of several enhanced graphical modes, called frame buffer consoles. I usually use the standard option myself.
If you use a frame buffer mode, the kernel displays Tux on screen during bootup. Tux is the Linux mascot. He is a cute little penguin. The frame buffer modes also generally use a smaller text font.
As you can see, people have fun drawing Tux in different situations:
 |
 |
 |
 |
 |
 |
 |
 |
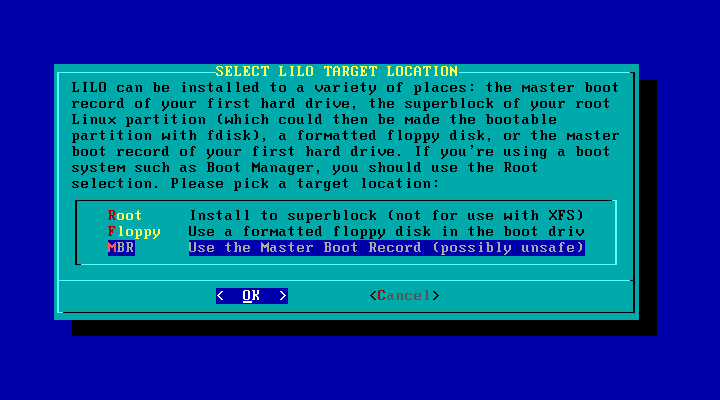
Next we must decide where to install LILO. The Master Boot Record (MBR) is almost always the correct choice, despite the warning.
I only ever had a problem installing LILO to the MBR twice. The first time I installed Linux on a system that was already configured to use OS/2's boot manager. The two boot managers did not get along very well. The other problem was caused by attaching a very large hard drive to a computer with an old BIOS. The old BIOS just did not support such a large drive. A modern system with a current BIOS should not have any problems with that.
If you decide to use the Root option, then LILO will be installed to your main Linux partition only. In order to boot Linux then you have to mark that partition as bootable. This can be done using FDISK (DOS or Linux versions) or other Disk Managers, such as the Disk Management tool under Windows NT/2000/XP. It is awkward to have to change the bootable flag just to switch from one operating system to another however, so try the more convenient MBR option first.
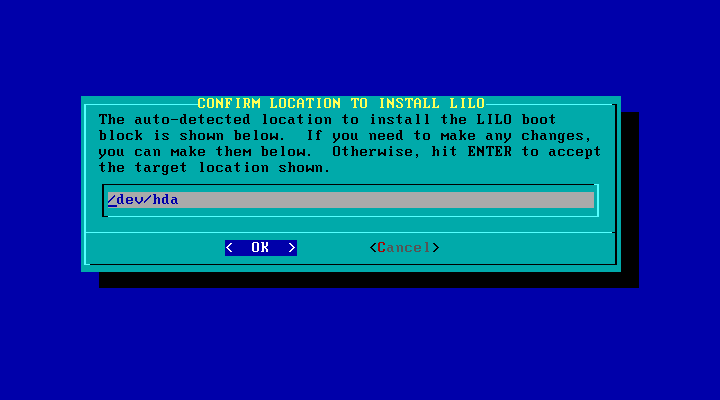
Up until now, the options are the same as the simple mode. The expert mode gives us
extra control however. This screen allows you to define exactly which hard drive's
Master Boot Record you wish to update. In all but the rarest cases, /dev/hda
is the correct option for IDE-based systems. If you have a SCSI-based system, then usually
/dev/sda is the correct choice then.
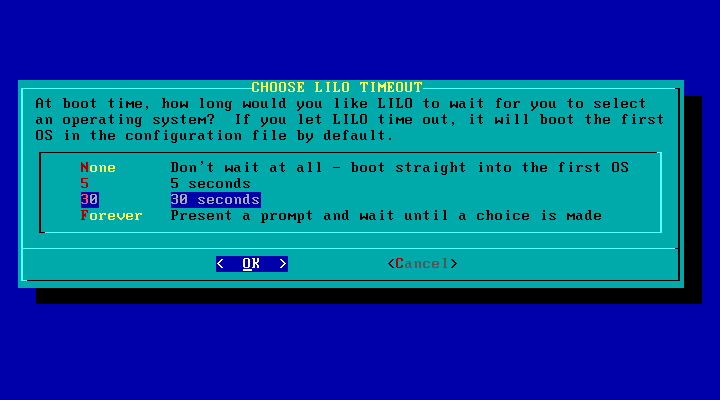
Next we can control how long the LILO menu remains on screen when we reboot. I normally use the 30 second option myself.
Next we will be returned to the menu. We want to be able to boot Linux, so arrow down and select the Linux option to continue.
You will be presented with a list of all the available Linux partitions from all the hard drives. You must enter the device name of the main partition used to install Slackware.
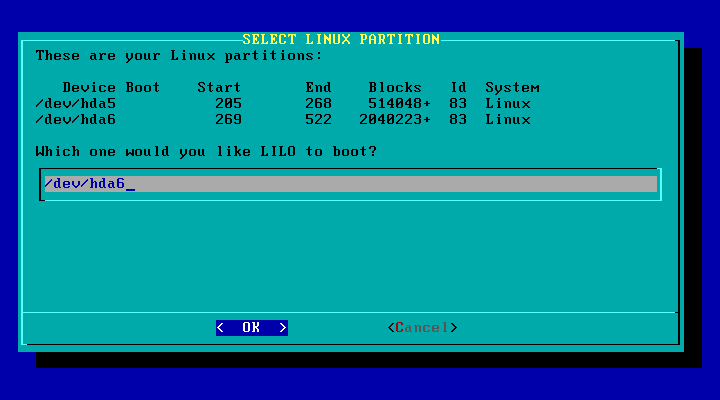
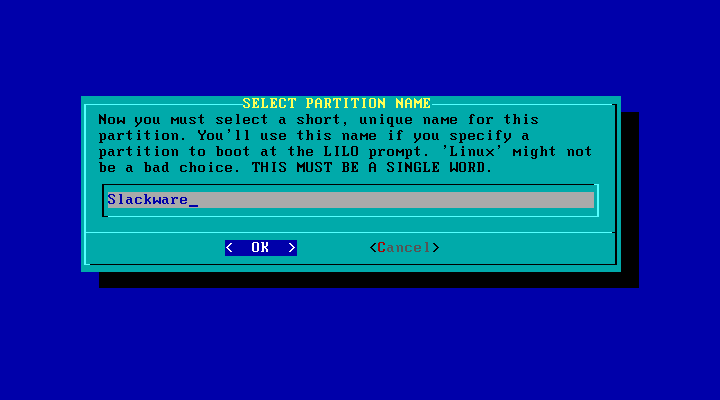
Next, you must assign a name to this operating system. This name will be shown on the LILO boot menu when you restart the computer. Linux or Slackware are valid names. Dashes are okay, but spaces and other special characters are not allowed.
NOTE: It is possible to install Linux more than one time on a
single computer. I have installed Slackware and RedHat together on the same computer
several times. You do have to be careful and remember which partitions are used by
Slackware and which are used by RedHat. You can actually share some of the partitions
(such as /home) between the two versions of Linux. If do install multiple
copies of Linux, repeat the steps above to add each main Linux partition to the LILO
boot menu. The only hassle I have doing that anymore is that Slackware uses LILO and
RedHat uses GRUB, but that too can be resolved.
Next you may want to add DOS/Windows to the boot menu so you can choose to run it instead during startup. This is called dual-booting the system. You can add as many different options to the menu as desired, but wouldn't it then be called triple-booting or quad-booting?
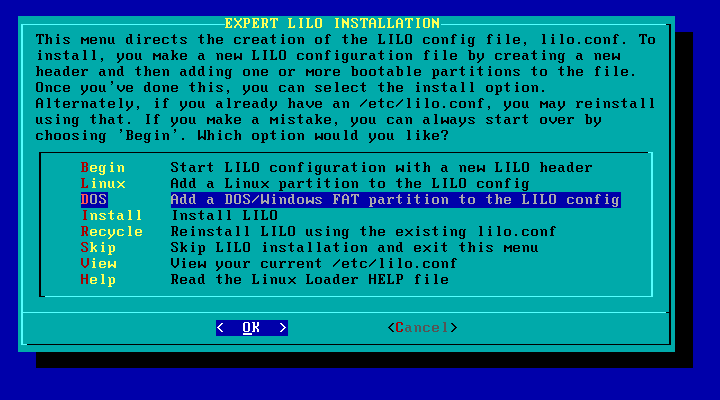
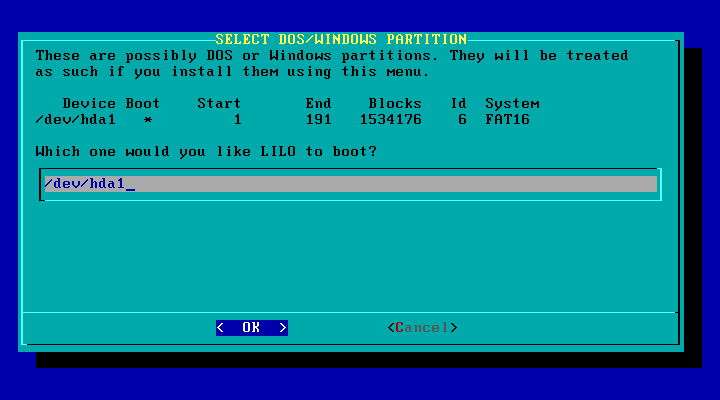
All detected FAT and NTFS partitions will be displayed on this list. Just
enter the correct partition name where Windows is installed. In this example,
/dev/hda1 is the partition that Windows refers to as C:.
Again we must provide a name for this boot option that describes the operating system.
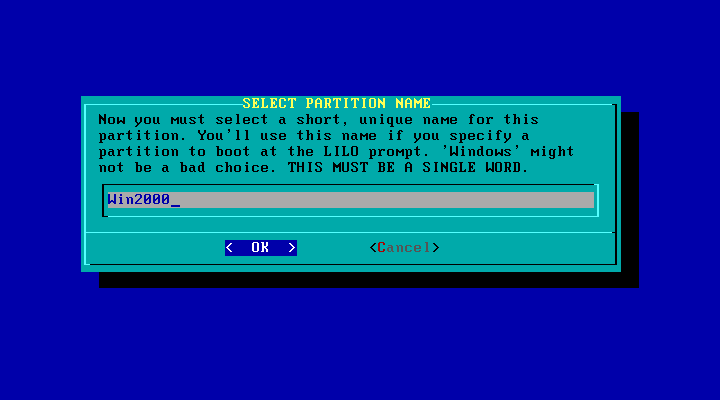
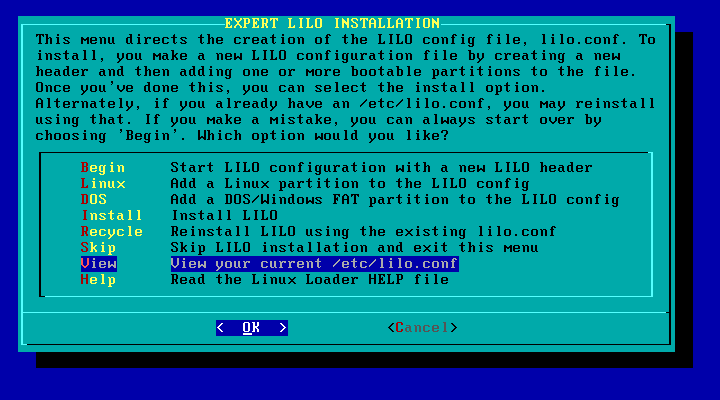
We are actually done, except for installing LILO to the Master Boot Record. I usually
like to view the /etc/lilo.conf file and check for obvious errors first however.
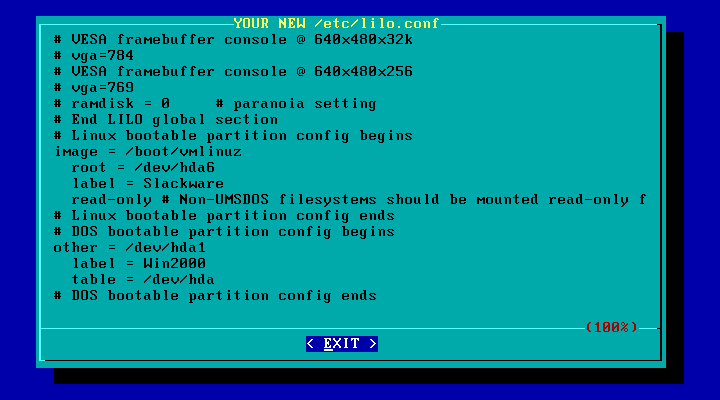
The most important lines in the /etc/lilo.conf file are near the bottom. The
Linux parition is described by these lines:
image = /boot/vmlinuz

  root = /dev/hda6

  label = Slackware

  read-only
Where:
image = /boot/vmlinuz | Tells LILO the file name of the Linux kernel itself |
root = /dev/hda6 | Informs the kernel which partition to use as the / (root) area |
label = Slackware | The text to display on the boot menu |
read-only | This is required when starting Linux |
The Windows boot option is described by these lines:
other = /dev/hda1

  label = Win2000

  table = /dev/hda
Where:
other = /dev/hda1 | Tells LILO to transfer control to another different boot loader stored on this parition |
label = Win2000 | The text to display on the boot menu |
table = /dev/hda | Tells LILO where to find the partition table to pass to the other boot loader |
Finally if everything looks okay, we can actually install LILO using the appropriate option.
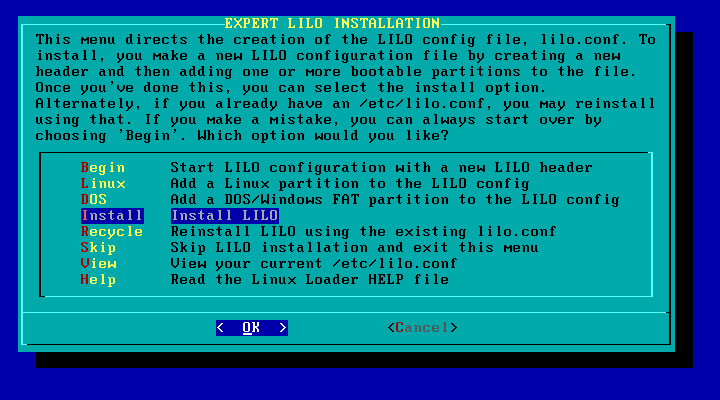
NOTE: Remember you can rerun this again later using the liloconfig command while logged in as the root user.